A few days ago I decided to upgrade the packages on my Lucid VPS and today I
noticed that there is a queue of unsent messages on my VM host with “Service
unavailable” response from my mail relay on the VPS host.
Upon closer examination I found that the mail log was full of:
Nov 18 06:45:25 yankee postfix/smtpd[25869]: warning: connect to Milter
service inet:localhost:8891: Connection refused
Nov 18 06:45:25 yankee postfix/smtpd[25869]: NOQUEUE: milter-reject: CONNECT
from unknown[2a01:d0:801a:1::12]: 451 4.7.1 Service unavailable - try again
later; proto=SMTP
What happened is I got a new opendkim package (2.6.8-0ubuntu1~ubuntu10.04.1)
which listens on a unix domain socket by default, and not inet interface which
I had configured for the filters.
The fix was to update /etc/opendkim.conf and add this:
Socket inet:8891@localhost
Alternatively, this can be configured in /etc/default/opendkim:
# Uncomment to specify an alternate socket# Note that setting this will override any Socket value in opendkim.conf#SOCKET="local:/var/run/opendkim/opendkim.sock" # default#SOCKET="inet:54321" # listen on all interfaces on port 54321#SOCKET="inet:12345@localhost" # listen on loopback on port 12345#SOCKET="inet:12345@192.0.2.1" # listen on 192.0.2.1 on port 12345
This took a while since I could not recall how I configured opendkim to listen
to tcp socket in the first place. At least now it is obvious.
I have since moved away from WordPress back to a static generator, so
everything below can be considered an outdated information.
Having performed initial migration from Octopress to a hosted WordPress
installation I found that I became in charge of login security. The hosting
provider I am currently using provides neither dedicated IP addresses nor
shared SSL certificates (update: it does provide a dedicated IP address upon request, but requires a
support ticket and a small fee for that) it means that my WordPress password
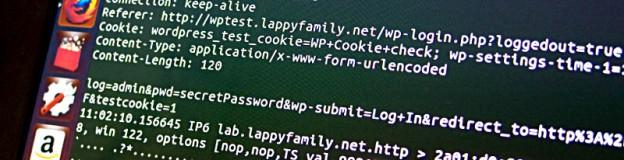
and session information is transmitted in clear text. Of course, when I am at
home it’s not a big deal, only the ISP may intercept it. But when I am
anywhere else, my devices can connect to some unprotected Wi-Fi access point
and accidentally surrender my credentials to somebody running tcpdump nearby…
Update: Since I found out that the hosting provider actually provides a
dedicated IP upon request for a quite small fee (25₴ at the moment, around
$3), the value of the article has decreased. However, it is perfectly usable
when nginx and wordpress are installed on the same host/datacenter but nginx
is fronting apache.
I have a VPS which is used for occasional VPN access (using OpenVPN). One
option was to always start OpenVPN client before accessing the blog. I could
easily forget to do that. My browser may open the tab where I am already
logged in and then my session cookie can be easily intercepted. Also I can’t
use this VPS for WordPress hosting itself because it has only 512Mb of RAM and
bringing up a SQL server, HTTP server (as well as keeping existing mail server
setup, bip and OpenVPN running) may cause something to fall outside the
available memory. Having said that, it looks like it is possible to run a
WordPress blog in a similar configuration with whopping 10 million hits a day.
I decided to make this VPS act as a proxy server, which listens to HTTP and
HTTPS traffic and forwards the requests to the hosting provider. In this case
everything will pass through the VPS.
Since this VPS is a low-profile one, a slim HTTP server is required. While I
am already familiar with Lighttpd, I decided to try nginx.
You will need a SSL certificate. StartSSL is a
good place to get one for free and it is recognized by major browsers out of
the box. Approving new accounts takes time so I decided to use the old proven
self signed certificate first and then change it to a proper one.
Here I would like to remind how important StartSSL client certificate is. You
get the client certificate upon account approval and then use it to log into
StartSSL control panel. This certificate will eventually expire and if you
fail to renew it, you will never be able to get back to your account. Don’t
repeat my mistake – when StartSSL tells you the certificate is about to
expire, then get a new one immediately.
The VPS is running Ubuntu 10.04 LTS and (naturally) nginx version is quite old
(0.7.65, February 2010). Nginx team has a PPA that builds packages for 10.04
too, so installation was simple:
Nginx comes with a proxy cache module. At first I started with a simple
configuration that cached everything, then I found that the pages that were
rendered for some commenter were also served to other people disclosing the
previous commenter’s email. This is why preventing serving the cached content
to the owners of our cookies is so important.
nic.ua also uses nginx as a proxy in front of apache. Therefore it is
overwriting the X-Real-IP header which my proxy is setting. In order to work
around that I used X-Upstream-Real-IP header, which I use in .htaccess to set
UPSTREAM_PROXY_TRUSTED variable. The latter is then checked in wp-config.php
to decide whether X-Forwarded-Proto and X-Upstream-Real-IP headers can be
trusted. These X- headers can easily be forged and X-Forwarded-Proto should
only be used if it comes from the trusted sources, or else the MITM attacks
become extremely easy.
server{
listen[::]:80;
server_namewww.rtg.in.uablog.rtg.in.ua;
rewrite^http://rtg.in.ua$request_uri?permanent;
}upstreamwordpress{
server91.209.206.62:80;
}proxy_cachecache;
server{
includeproxy_params;
# sites-available/default should also have listen directive changed# for IPv6 & IPv4 to work to # listen [::]:80 default_server;listen[::]:80;
server_namertg.in.ua;
access_log/var/log/nginx/rtg-in-ua.access.log;
location/{
proxy_passhttp://wordpress;
proxy_cache_valid4041m;
# we should not serve cached version if we have one of these cookiesif($http_cookie~*"wordpress|comment_author|wp-postpass_"){
set$bypass_cache1;
}proxy_cache_bypass$bypass_cache;
}# These are completely static and can be shared between# HTTP and HTTPS virtual hostslocation~*\.(jpg|jpeg|png|gif|css|js|mp3|wav|swf|ogg|txt){
proxy_cache_key$host$request_uri;
proxy_cache_valid200120m;
# 30 daysexpires2592000;
proxy_passhttp://wordpress;
}location~*(^|\/)feed\/{
proxy_cache_valid20060m;
proxy_passhttp://wordpress;
}}# HTTPS server# We allow all interaction to happen over HTTPS too.server{
listen[::]:443;
server_namertg.in.ua;
includeproxy_params;
sslon;
ssl_certificate/etc/ssl/certs/rtg-in-ua.crt;
ssl_certificate_key/etc/ssl/private/server.key;
ssl_session_timeout5m;
ssl_protocolsSSLv2SSLv3TLSv1;
ssl_ciphersALL:!ADH:!EXPORT56:RC4+RSA:+HIGH:+MEDIUM:+LOW:+SSLv2:+EXP;
ssl_prefer_server_cipherson;
access_log/var/log/nginx/rtg-in-ua.access.log;
location/{
proxy_cachecache;
proxy_cache_valid4041m;
if($http_cookie~*"wordpress|comment_author|wp-postpass_"){
set$bypass_cache1;
}proxy_cache_bypass$bypass_cache;
proxy_passhttp://wordpress;
}location~*^(wp-admin|wp-login){
proxy_passhttp://wordpress;
}location~*\.(jpg|jpeg|png|gif|css|js|mp3|wav|swf|ogg|txt){
proxy_cache_key$host$request_uri;
proxy_cache_valid200120m;
expires2592000;
proxy_passhttp://wordpress;
}location~*(^|\/)feed\/{
proxy_cache_valid20060m;
proxy_cachecache;
proxy_passhttp://wordpress;
}}
proxy_set_header Host $host;
# This gets overwritten:
proxy_set_header X-Real-IP $remote_addr;
# This is our own header:
proxy_set_header X-Upstream-Real-IP $remote_addr;
proxy_set_header X-Forwarded-For $proxy_add_x_forwarded_for;
proxy_set_header X-Forwarded-Proto $scheme;
While it looks like I am just re-setting proxy_cache_key to the default value,
nginx is actually using backend URL by default (contrary to the docs!), thus
you will be serving a document full of generated HTTP links on a HTTPS
connection and vice versa.
I decided to create a new directory for the cache:
And now we need WordPress to redirect all the login and admin activities to
https:// urls as well as trust X-Forwarded-Proto HTTP header by adding the
following to wp-config.php:
.../** http://codex.wordpress.org/Administration_Over_SSL*/define('FORCE_SSL_ADMIN', true);define('FORCE_SSL_LOGIN', true);/** This variable is set in .htaccess in case* REMOTE_ADDR is one of our upstream proxies*/if ($_ENV['UPSTREAM_PROXY_TRUSTED']) { if ($_SERVER['HTTP_X_FORWARDED_PROTO'] == 'https') $_SERVER['HTTPS']='on'; /* * X-Real-IP is overwritten by nginx proxy @ nic.ua * so we are using our own header. */ $x_real_ip = $_SERVER['HTTP_X_UPSTREAM_REAL_IP']; // IPv4 in IPv6 notation if (substr($x_real_ip, 0, 7) == "::ffff:") $x_real_ip = substr($x_real_ip, 7); $_SERVER['REMOTE_ADDR'] = $x_real_ip;}/* That's all, stop editing! Happy blogging. */...
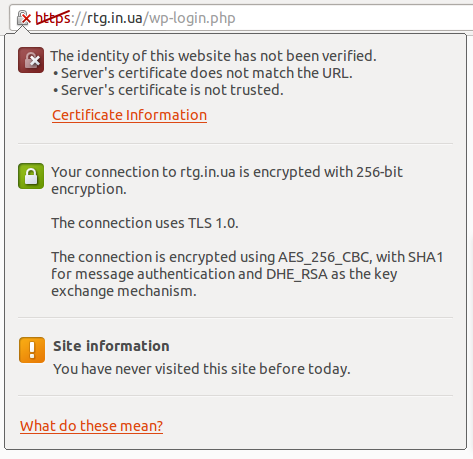
That’s pretty much it. Self-signed, but encrypted:
Chromium SSL popup
This approach has several flaws. First of all, I am increasing the number of
points of failure. Since the data has to travel from Ukraine to the US even
when request comes from Ukraine, the latency is increased a bit. CDN usage also
gets more complicated (unless static files are served on a different domain).
Neither of these issues is currently bothering as I am still in the process of
migrating my content.
Please note that I am not a nginx guru, so if you see any error in the
configuration, let me know.
Мою фамилию коверкали различными способами – Ляпишев, Япишев, Епищев, даже
Ёжиков. В официальных документах я всегда первым делом проверял фамилию.
В один прекрасный день работы в Venali мы узнали о том, что есть возможность
поехать в США и что-нибудь там делать. Для того, чтобы поеать в США нужна виза,
а визу надо клеить в заграничный паспорт.
Значит надо делать паспорт.
Иду собираю все необходимые справки, включая из ненавистного военкомата, однако
так как по слухам уехать мы можем очень скоро, то решил делать паспорт в
срочном режиме.
Заполняю все необходимые документы в ОВИРе. Вроде все правильно, но меня
почему-то не насторожило отсутствие поля, где я бы мог вписать свое имя
латинскими буквами. При окончательном формировании документа по их правилам моя
фамилия преобразовалась в
IEPISHEV
Как это читать?
Исправлять на месте нельзя. Раз софт сказал так транслитерировать, так и будет.
Еду домой, начинаю штудировать всевозможные документы, отвечающие за
транслитерацию. Нахожу два взаимоисключающих закона. Согласно одному из них,
правильно писать таки YEPISHEV, согласно другому – IEPISHEV. Еду опять в
паспортный стол где меня обрадовали тем, что паспорт уже ушел в печать. Срочная
выдача паспорта оказалась уж очень срочной.
Через неделю я получаю паспорт с кривой фамилией, но решил не сдаваться.
Начинаю опять собирать документы для паспорта. В военкомате на меня посмотрели
как на идиота, но справку дали. Собрал все, что нужно и поехал опять в Киев. В
ОВИРе мне говорят, что нужен какой-нибудь документ, подтверждающий именно ту
транслитерацию, которую я хочу использовать. Несколько секунд на размышление
и оказывается, что это может быть любой документ, даже ISIC.
Мчусь на Крещатик делать ISIC, там первый вариант карточки мне выдают с “Roman
Y.”. С надеждой переспрашиваю, точно ли так правильно.
— Ой :)
Еду с ISIC в ОВИР, там делают с него копию, пишу заявление, начальник пишет “Не
заперечую”, опять сдаю все документы, дважды проверяю все поля.
Все, я теперь официально Roman Yepishev.
Y
В обязанности NOC инженера входили звонки телефонным операторам (carrier) и
выяснение вопросов типа “Почему не работает номер 1555123456?”, “А куда вообще
отправляются звонки?”. В большинстве случаев нужно просто указывать свое имя.
Наученный горьким опытом (“Mister ye-pi-sch..ev?”), я предпочитал просто
говорить свое имя без фамилии.
Operator: May I have your name please?
Me: Roman
Operator: Em, what is the last name?
Me: Well, put “Y” there
Operator: I am sorry, but we require the full name to be specified.
Me: Okay, it is Yepishev
Operator: (5 секунд паузы) Okay, I will put “Y” there.
Update (2012-11-21): The reader is back from the service centre and it appears
to have the issue fixed.
If you see your reader displaying the same symptoms, please check whether
firmware update fixes the issue. Otherwise the only way to fix it is to send
the device for repair. This is a hardware failure and it is covered by the
warranty.
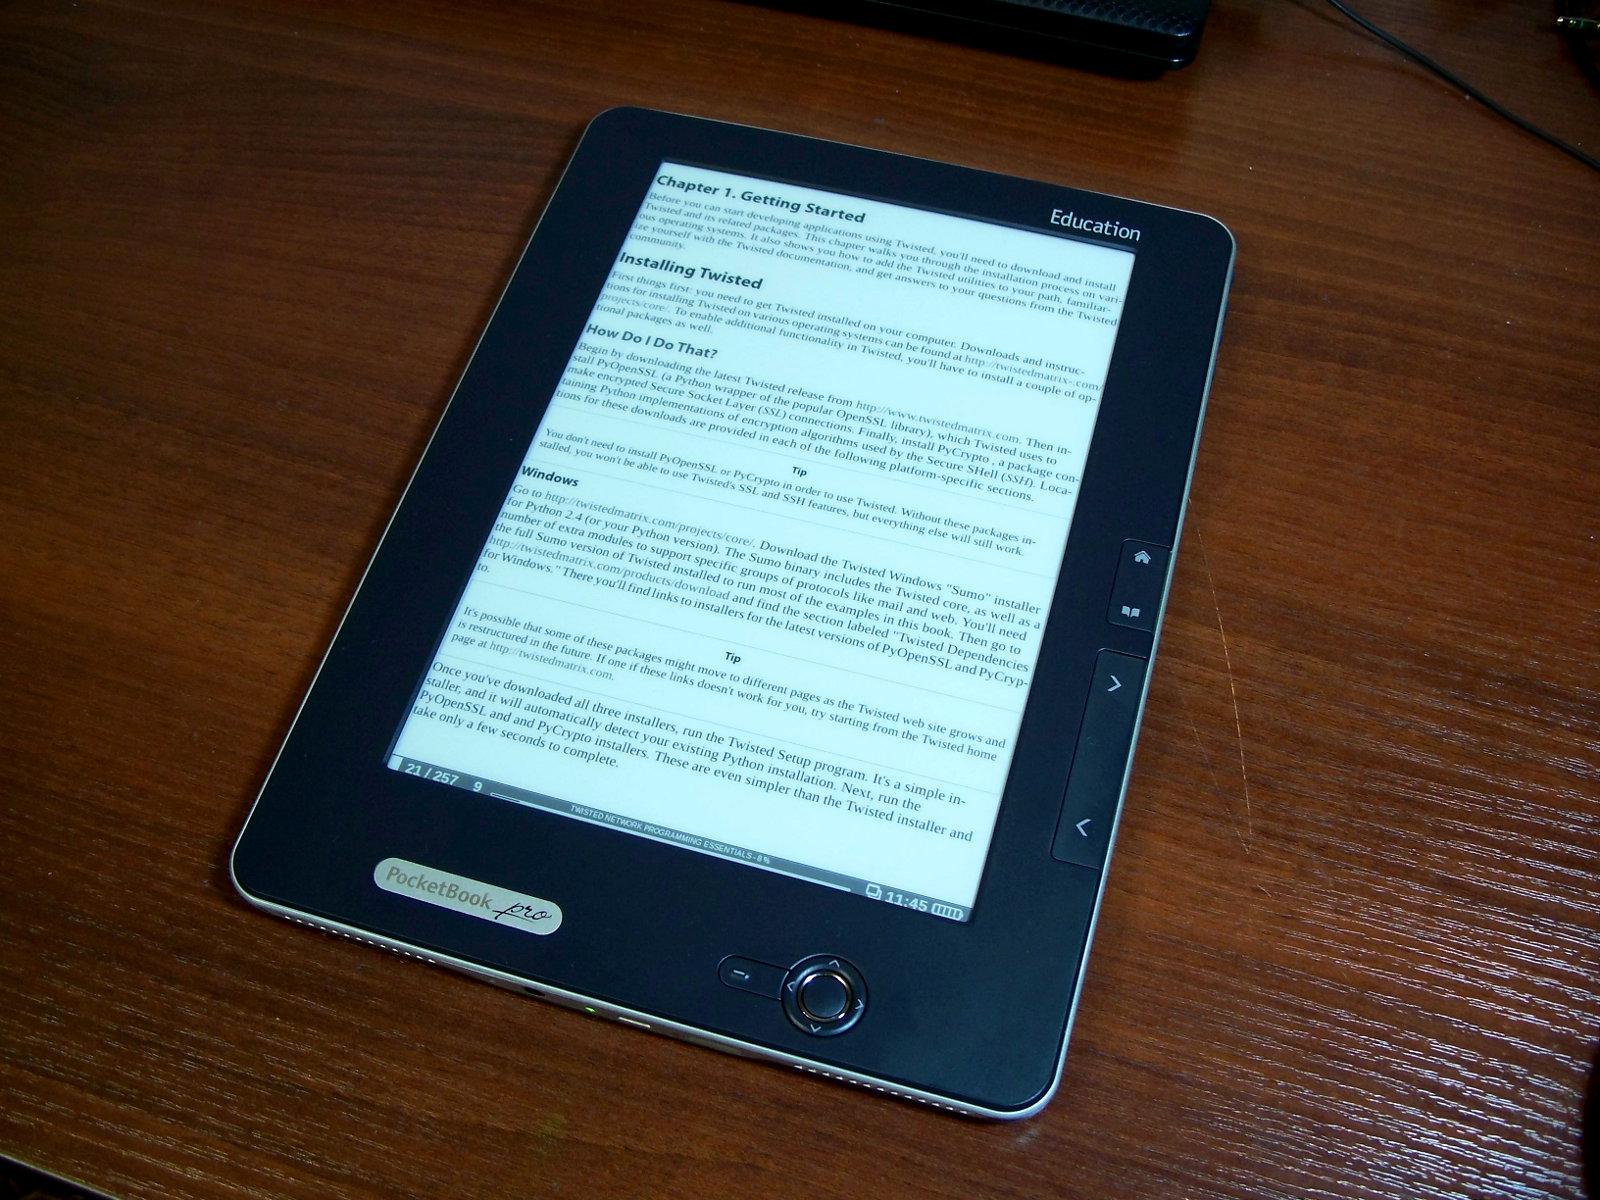
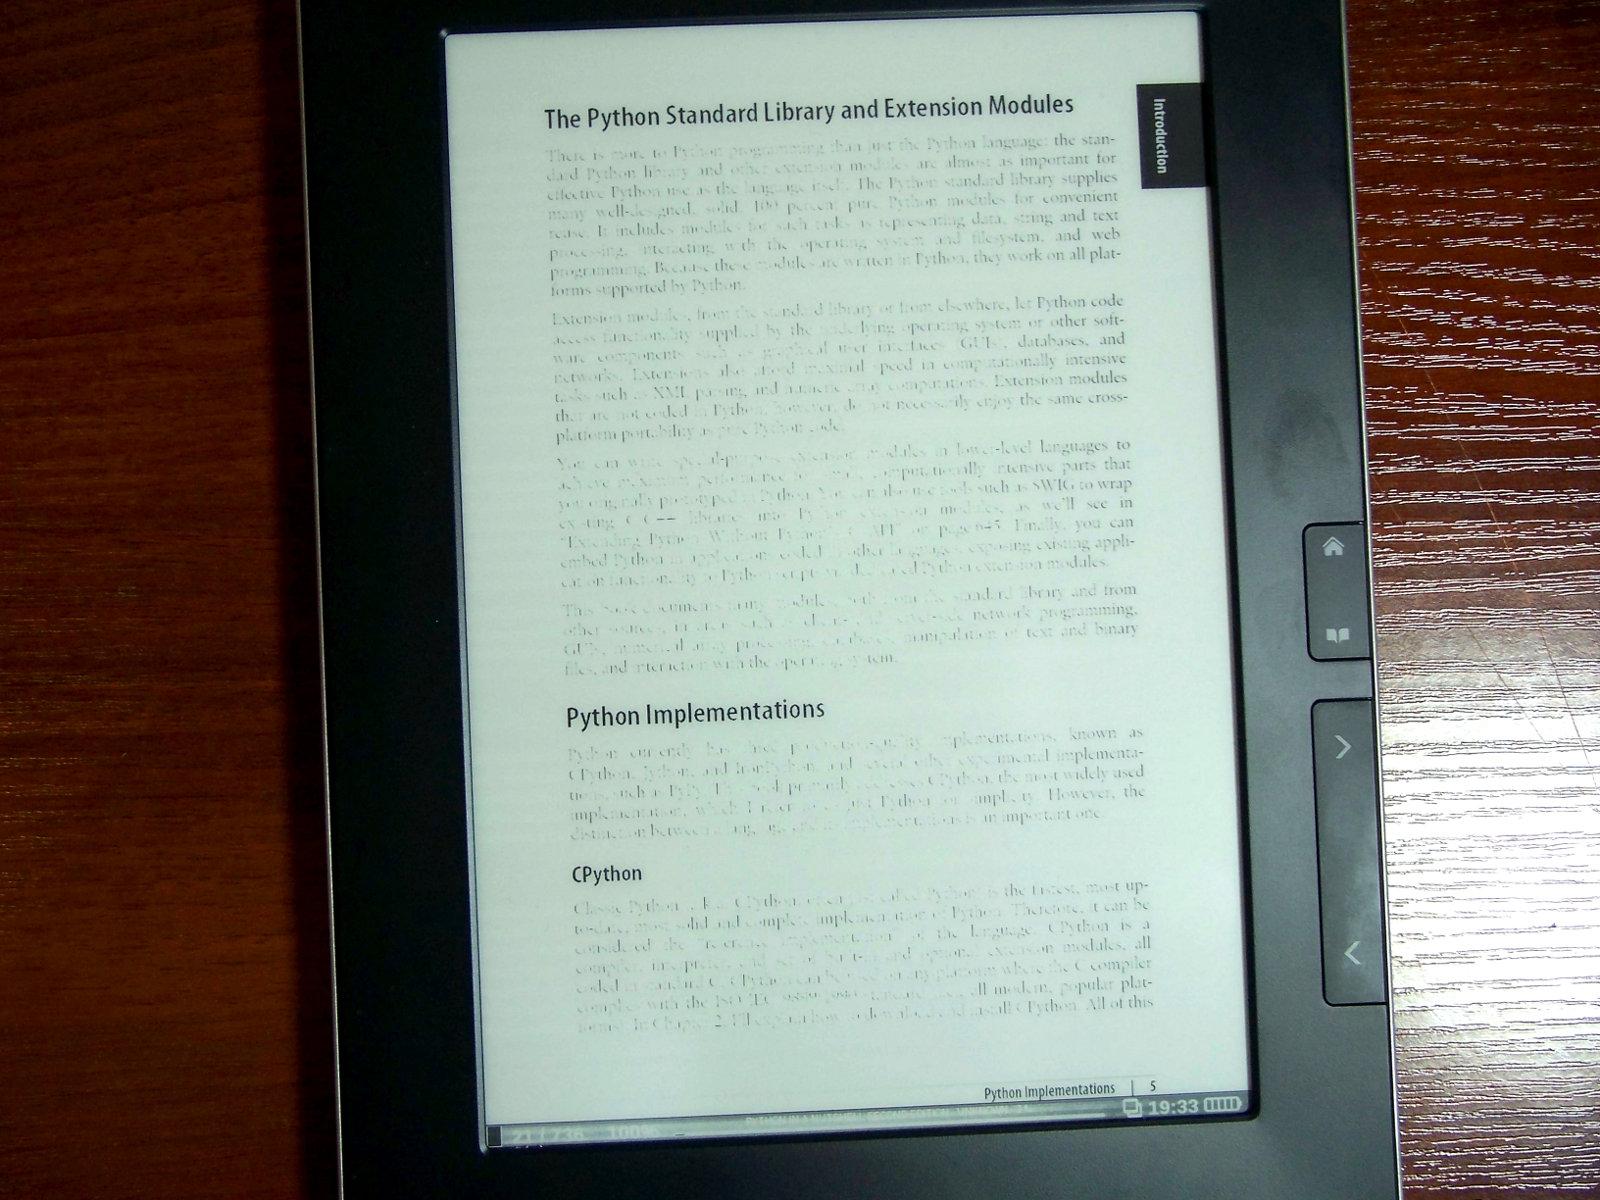
This is what went wrong. Upon bringing it home and connecting to Wi-Fi it
prompted me to update the software. I decided that was a good idea. I haven’t
played a lot with it before firmware update but after firmware update it came
back with completely washed out display.
The reader was immediately returned for diagnosing as it looks like a hardware
fault.
Here’s how it looks when first started:
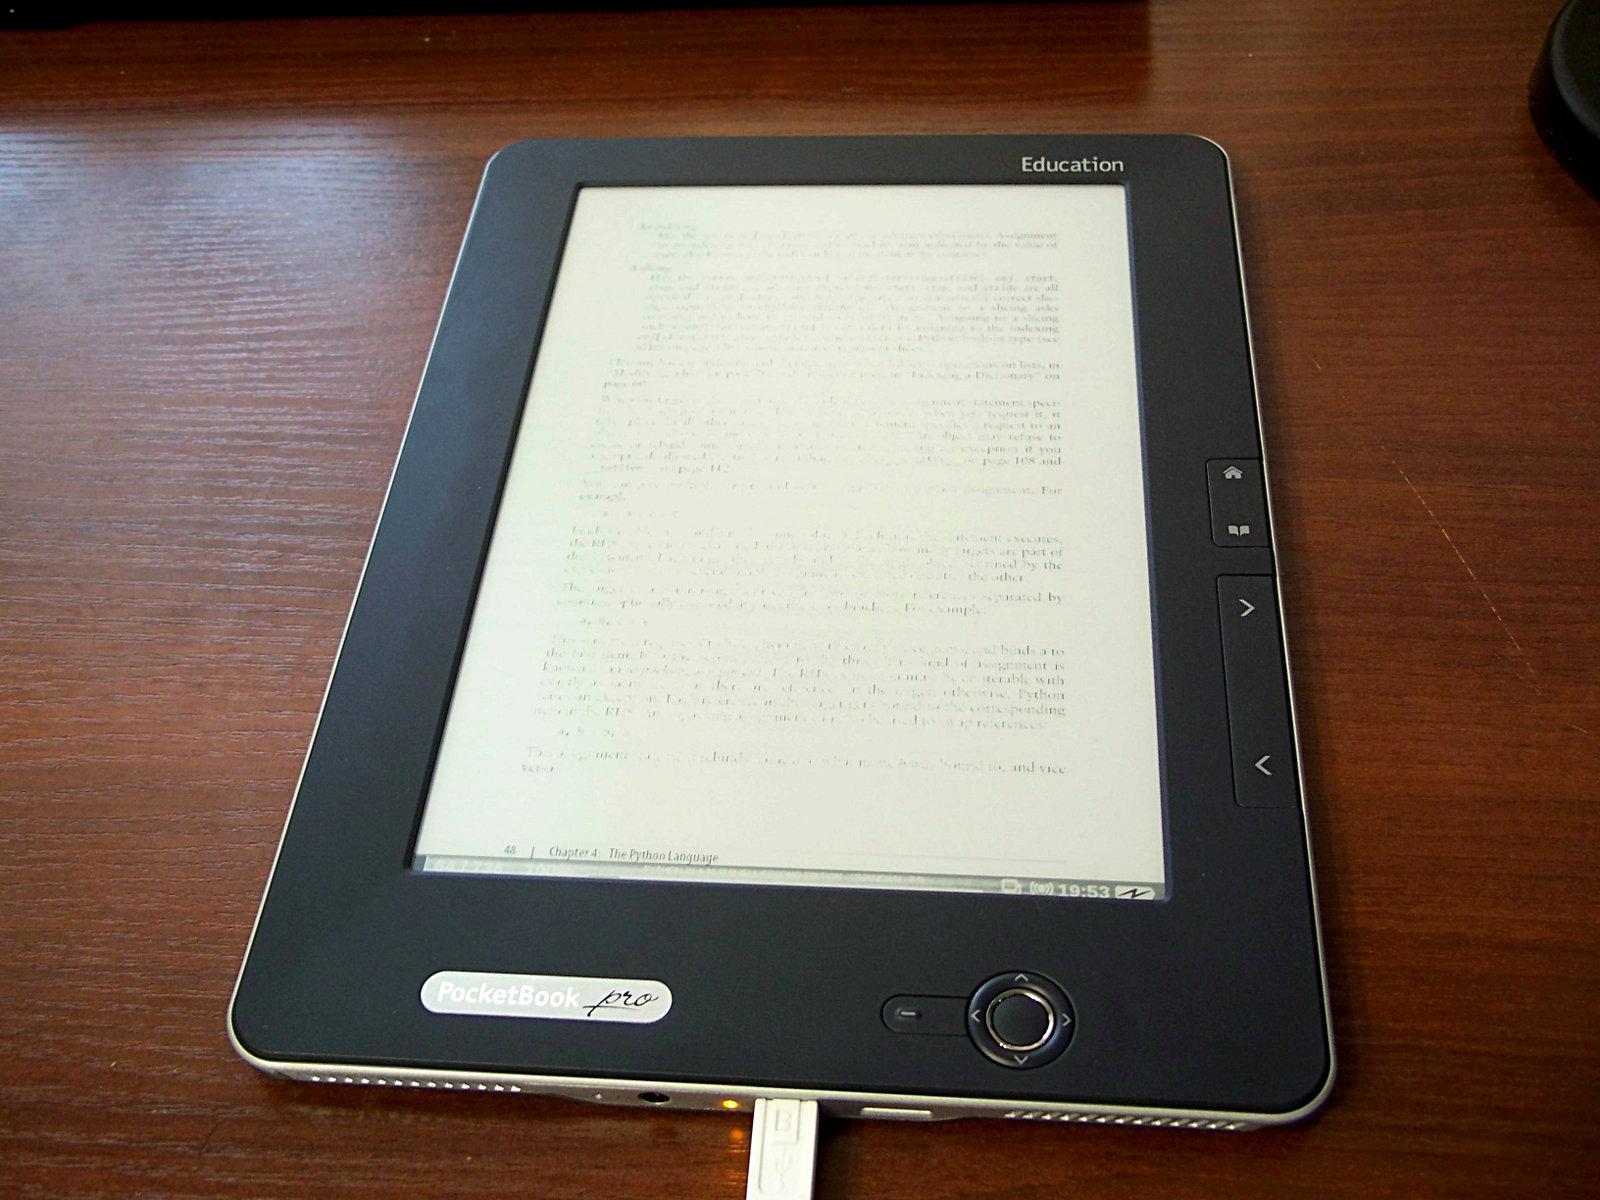
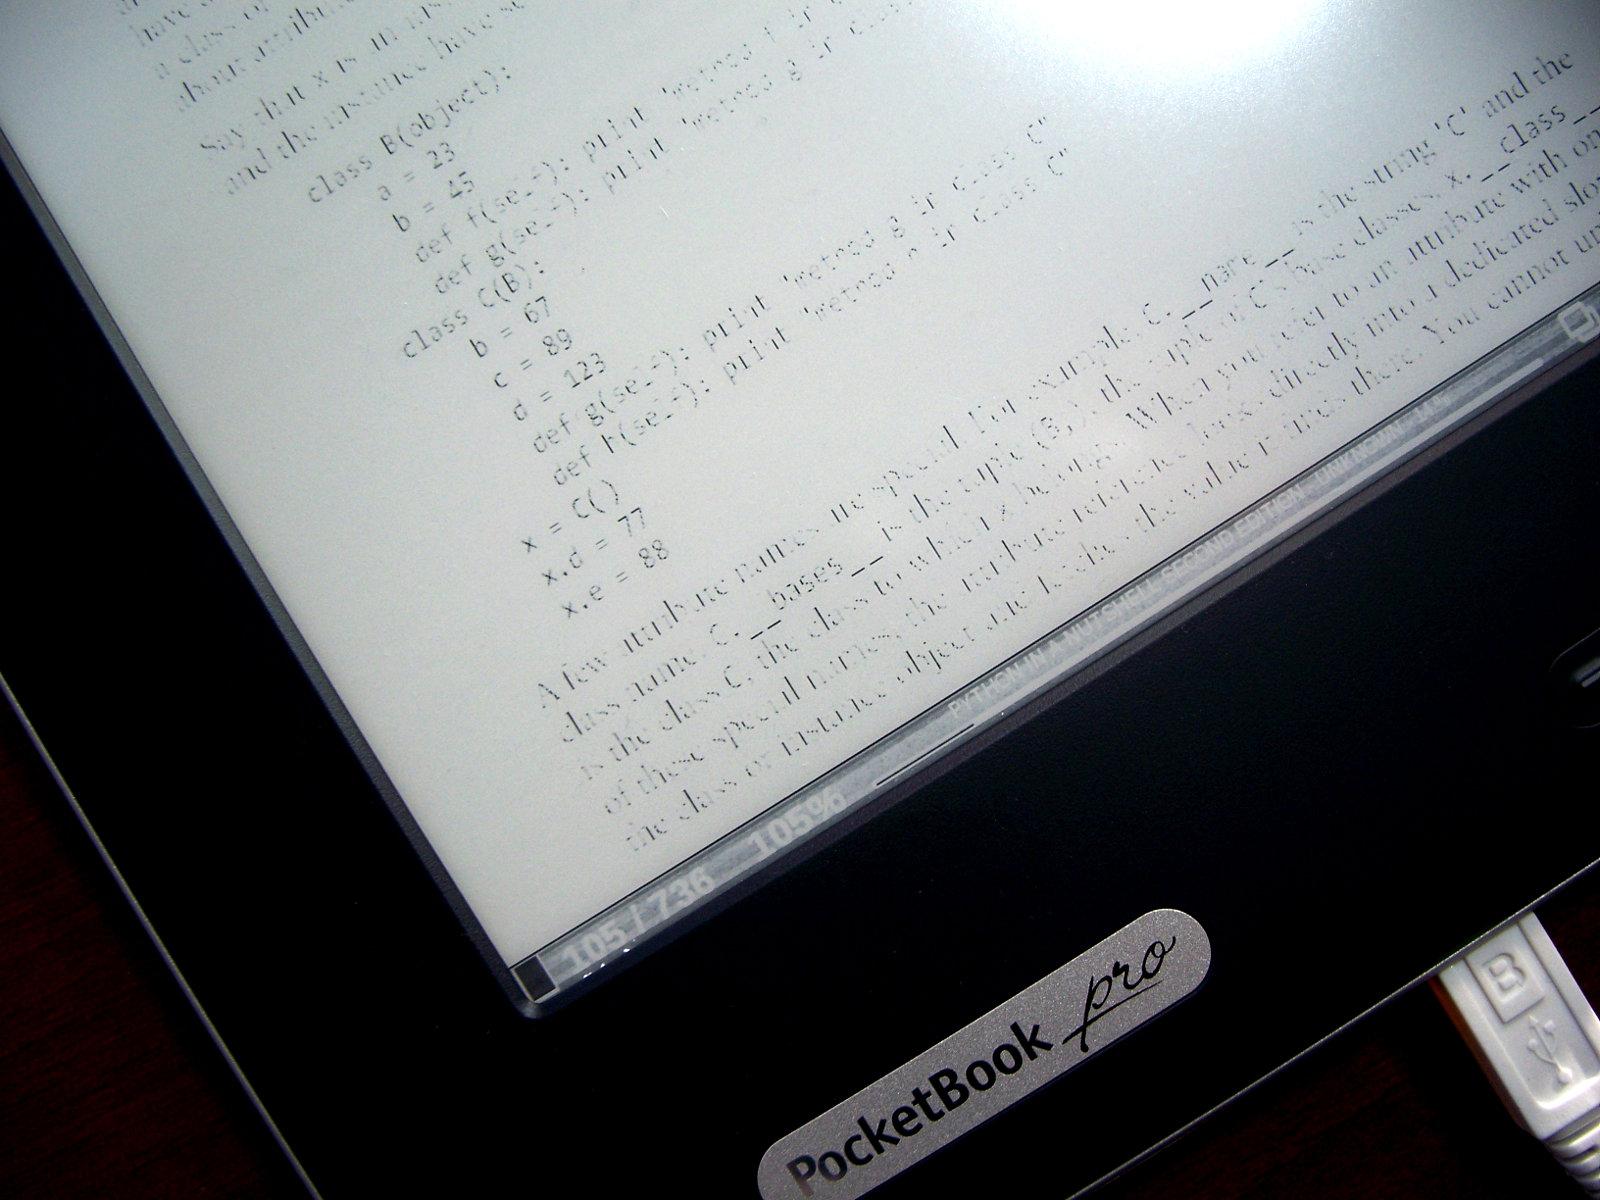
Then, after you start reading something, the letters start to disappear:
In the end you can’t actually read anything properly (except for the solid
black text, for some reason):
If you shut the device down and turn it back on after 10 minutes the display
looks normal again.
There is a firmware for devices that exhibit such behavior. Unfortunately it
did not change much – grey areas were still disappearing but at a slower rate.
At some point the following started to happen in my small httplib2-based
script:
Traceback:...File "/usr/lib/python2.7/httplib.py", line 996, in _send_request self.endheaders(body)File "/usr/lib/python2.7/httplib.py", line 958, in endheaders self._send_output(message_body)File "/usr/lib/python2.7/httplib.py", line 816, in _send_output msg += message_bodyUnicodeDecodeError: 'ascii' codec can't decode byte 0xd0 in position 245: ordinal not in range(128)
I know that earlier I would start putting .encode() and .decode() randomly to
make it run but now I am much better at understanding the reason of the failure
after watching an awesome talk by Net Batchelder titled “Pragmatic Unicode, or,
How do I stop the pain?”
Now it took me mere seconds to find the reason. In the traceback above,
UnicodeDecodeError was raised because msg was already a unicode object, and
message_body was a str. It happened because the URL supplied to the request
method was unicode. Python 2.7 was trying to concatenate unicode and str,
decided that it’s best way to make message_body a unicode string using the
default ascii encoding, but the content was full of symbols outside ASCII
space. Converting URL to str fixed the issue as URLs are not good candidates to
be passed around decoded.
My Acer EXIF Fixup application was published in Google Play. This will
be only interesting to Acer Liquid owners who are tired of having to
post-process EXIF produced by the phone camera.
I am not terribly happy with the code as it does not do proper locking to
prevent concurrent modification or uses AsyncTask inside an Activity (in case
of scanning for existing images), but it fixes my issue so I am happy to share
the result.
After a long series of unsuccessful attempts to make XBox 360 play all the
videos we had without resorting to a Windows VM, I decided to connect my
existing home server running Ubuntu to the TV and install
mythbuntu-desktop.
Everything went quite well, I added the startup of mythfrontend to autostart
and purchased a cheap USB HID remote (detected as 073a:2230 Chaplet Systems,
Inc. infrared dongle for remote, here’s the MythTV Wiki page on these) without
looking closely at the design of the device itself.
The receiver emulates a USB HID keyboard with media keys and in order for
MythTV to receive these keys one needs to do the following:
Disable xfce4-volumed — copy the /etc/xdg/autostart/xfce4-volumed.desktop to
~/.config/autostart and add Hidden=true to the section. That way the
XF86AudioLowerVolume, XF86AudioRaiseVolume and XF86AudioMute events can
reach the application. Alternatively, you can just uninstall
xfce4-volumed package
Disable multimedia plugin of gnome-settings-daemon — it will also capture
the media key presses and also prevent the application from receiving
XF86Audio{Next,Prev,Pause}events:
$ gsettings set org.gnome.settings-daemon.plugins.media-keys active
false
Configure the keys in MythTV interface.
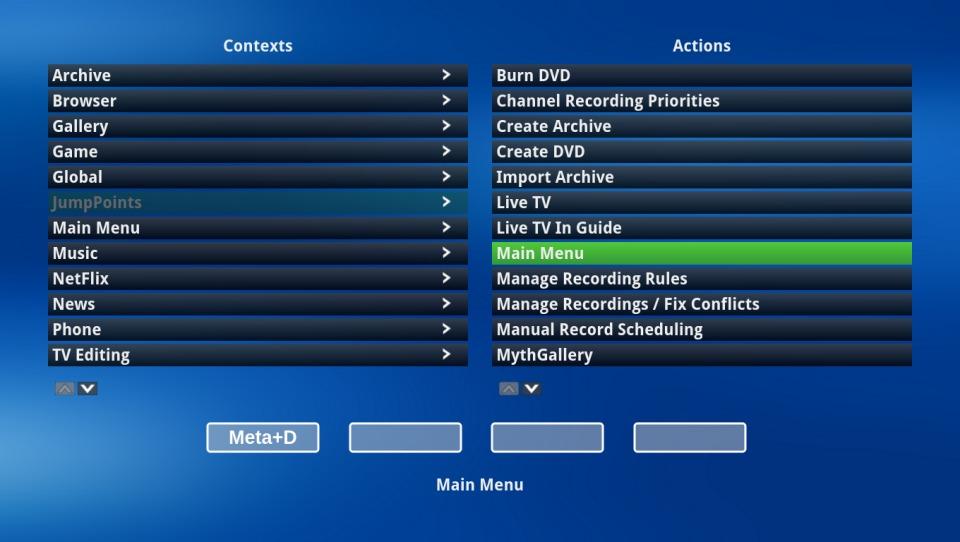
The remote I purchased features a large “Mouse” directional pad while the
regular keyboard keys actually used in MythTV were inconveniently located at
the bottom of the remote. It was not comfortable to navigate through the menu
so I decided to make this mouse-emulating “joystick” send regular keyboard
events.
The receiver feeds USB HID data to the system and it does not look like it can
give raw data for lirc. So I took python-xlib, googled for various parts I did
not know about and came up with the following script: mythtv-mouse2kbd.py,
which monitors the active window and performs the mouse movements into key
presses translation if “MythTV Frontend” is the active window. Also left mouse
button emits “Return” key and the right one emits “Escape”.
So now I can navigate around MythTV using this large joystick as if it was
originally designed to be used this way.
The only issue the script has is that grabbing the pointer for some reason
prevents Alt+Tab from working but once you exit MythTV (or switch to another
workspace) the pointer will be released, so that looks like a minor issue.
Please note that this remote will not work in BIOS configuration screen
because the device is emulating mouse.
The original XBox 360 kit contained only one controller. I decided to purchase another one after a while.
It’s weird that there is no official info on NSF-0001 model (which can be
bought e.g. online or various offline stores too, such as protoria.ua) at
Microsoft web site, you can only find JR9-00011 there.
Well… I bought it.
The bar code on the box is: 885370114843, part# X16-97925-01
The device itself has the following barcode: X853164-004
The look and feel differs. Original controller has a smooth surface while the NSF version has a matte look.
Also, the LEDs installed are different. NSF version is dimmer.
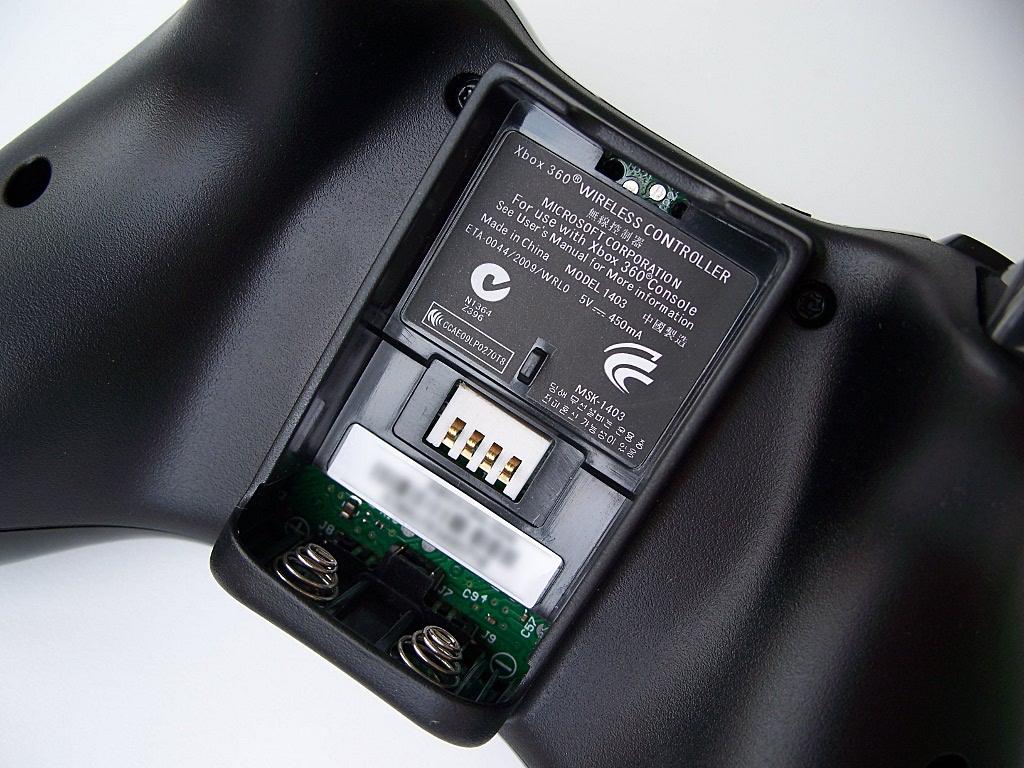
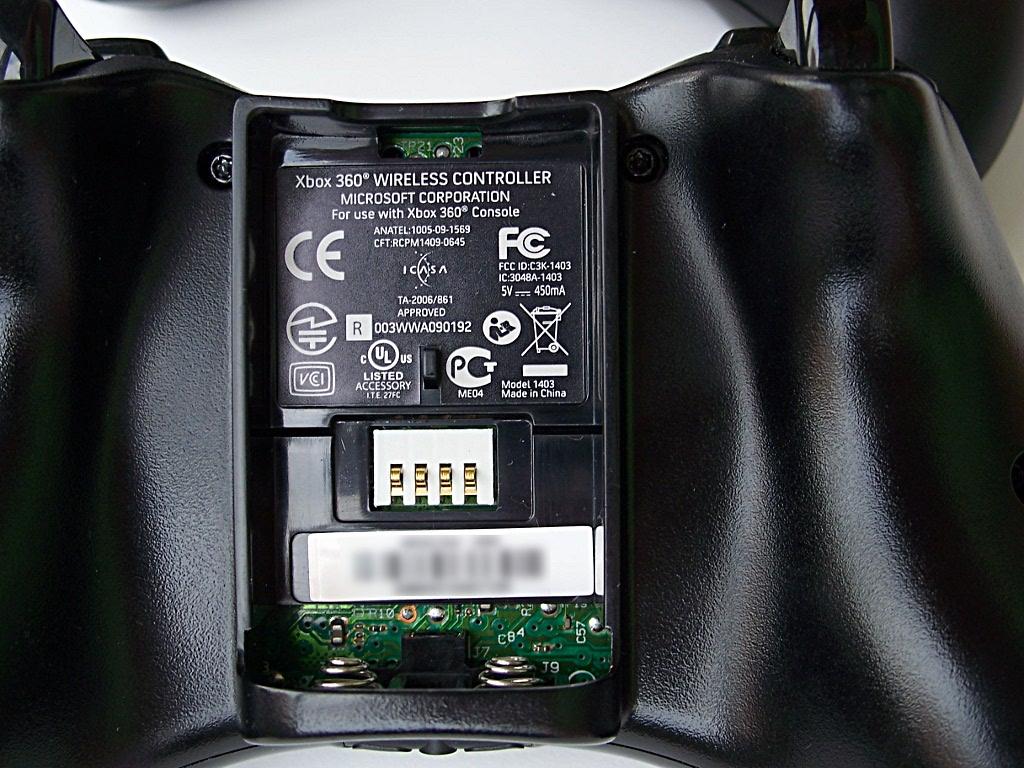
The label at the battery compartment contains less information than the
original controller but model name “1403″ is present.
NSF-0001
Original controller
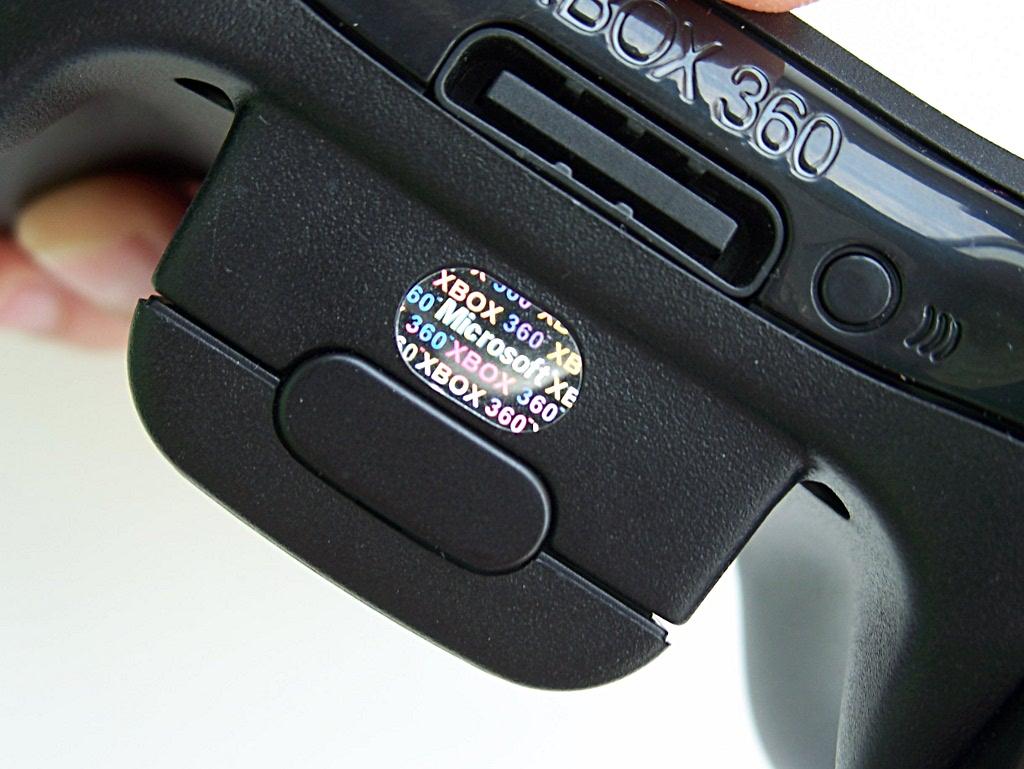
NSF controller also has a holographic label which differs from the one that is
attached to the kit version.
NSF-0001
Xbox 360 hologram
All Xbox 360 peripherals and accessories (including controllers, headsets,
adapters, and other related components) should have a small oval holographic
label placed inside an indentation on the device surface (similar to hardware
embossing). This label contains the Xbox 360 and Microsoft logos (which change
color and position as the label is tilted).
NSF labels do change the color but don’t change the position.
You can buy this controller even at BestBuy but it does not really look like an
original Microsoft device even though the exposed schematics at the battery
compartment look the same.
The controller weights 228g without the batteries and the original one is 218g.
It worked quite well during the original tests but after 2 months it started to
develop a fault at the left trigger which caused it to continue sending
“pressed” event even when released. It is not always reproducible so you may
want to pass on this device and purchase an original instead.
Відразу після переїзду в Голосіївський район я подав заявку на підключення до
“Теремки Лан”. Вибір провайдера був простий – побачив рекламу на дошці
оголошень та вирішив підключитися. Підкупило те, що серед внутрішніх
ресурсів були XMPP та NTP сервери. Можливо, ними я ніколи не буду користуватися, але
сам факт існування є цікавим. Під час подачі заявки формується договір (бажано
ім’я заповнювати українською мовою, хоча весь сайт російською), квитанція на
сплату двох місяців по тарифу + 1 гривню за підключення. Наступного дня мені
вже видали IP адресу.
Через 5 робочих днів після зарахування грошей на рахунок прийшли співробітники
провайдера, протягнули кабель, розповіли про налаштування.
Отже, DHCP в мережі немає, тому IP адресу треба прописувати вручну. Система
контролює доступ до мережі по MAC адресі. Все. Ніякої мороки з PPTP/L2TP.
На сайті статистики можна переглянути статус послуги та залишок на рахунку,
відправити повідомлення в NOC (network operations center) та згенерувати
квитанцію. Нічого зайвого, хоча зміну тарифного плану також потрібно буде
робити через NOC.
Система також вміє надсилати повідомлення про зміну статусу та недостатній
залишок коштів через SMS. Зручно.
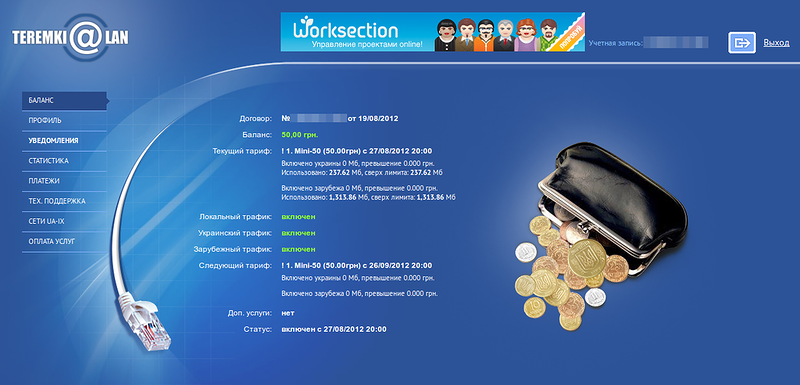
Поки підключився на тарифний план 10Мбіт/с за 50₴. Результати speedtest досить
адекватні:
Увага! Цей блог-пост написаний виключно для ознайомлення з технологією, що
застосовується Державною прикордонною службою України. Автор не несе
відповідальності за можливі протиправні дії читачів.
З метою створення комфортних умов для перетинання державного кордону та
прискорення проходження паспортного контролю Державною прикордонною
службою України запроваджено електронну магнітну картку.
– Державна прикордонна служба України (Зверніть увагу на URL. Шановні
прикордонники, “skipping” це не перетинання кордону. А
/activities/skipping взагалі виглядає так, наче одне з занять
прикордонної служби – це стрибки через скакалку).
Отже, за 17.86₴ можна придбати собі картку, що виглядає так:
Це просто біла картка без будь-яких написів. Після придбання я раджу відразу
підписати її.
Яким чином час проходження паспортного контролю зменшується? В аеропорті
встановлені спеціальні турнікети з RFID рідерами. Коли картку піднести до
рідера, її зчитують (це займає десь 5 секунд) і дані з неї передаються на
комп’ютер прикордонника. На той момент, коли ви підходите до співробітника
прикордонної служби, всі дані про вас в нього вже є. Залишається перевірити,
що картка відповідає паспорту.
«Розроблено технологію використання носіїв інформації у вигляді
електронних карток з чипами, які є аналогами чипів електронних паспортів.
На картку в електронному вигляді вносяться дані паспортного документу
особи та її фотокартка. Всі дані мають захисний код, який виключає
можливість несанкціонованого допуску до них».
– начальник управління зв’язку та інформатизації Державної
прикордонної служби Сергій Фесенко в інтерв’ю Радіо Свобода
Сама картка це SmartMX що емулює MIFARE 4K, вона працює на частоті 13.56МГц і
має 4 кілобайти пам’яті.
Зазвичай в таких картках після прошивання змінюють ключі доступу (див. цитату
вище), однак програмісти прикордонної служби вирішили це проігнорувати. Дякую.
Отже, в картці точно є код держави – UKR, Ім’я володаря паспорту, серія та
номер паспорту і фотографія у форматі JPEG (178×223, в моєму випадку 1.8kb)
такого виду:
Решту даних я поки що не розшифрував.
Картка дозволяє себе читати і перезаписувати, ключ A1 “FF FF FF FF FF FF”,
однак варто знати наступне:
Note: With each memory access the internal logic verifies the format of
the access conditions. If it detects a format violation the whole sector
is irreversible blocked.
Оновлено: написав про проблему зі стандартними ключами в прикордонну службу:
Я користуюсь карткою RFID для прискореного паспортного контролю практично з
початку її запровадження.
В інтерв’ю Радіо Свобода
(http://www.radiosvoboda.org/content/article/2319787.html) начальник управління
зв’язку та інформатизації Державної прикордонної служби Сергій Фесенко
повідомив, що “На картку в електронному вигляді вносяться дані паспортного
документу особи та її фотокартка. Всі дані мають захисний код, який виключає
можливість несанкційованого допуску до них”.
Нещодавно в мене з’явився доступ до стандартного RFID рідера (13.56MHz). Як
виявилося, картка використовує стандартний транспортний ключ FF FF FF FF FF FF,
що дає змогу зчитувати та записувати картку не тільки уповноваженим особам
Державної прикордонної служби, що створює можливість підробки картки та
маніпуляції даних на ній. Цей ключ підійшов до двох моїх карток (до старого та
нового паспорту).
Я вважаю, що це істотна проблема у безпеці даної технології (є можливість
віддаленого зчитування паспортних даних особи без її відома).
Прошу провести перепрошивку/перевипуск карток з використанням нестандартних
ключів доступу для унеможливлення несанкційованого доступу до даних картки.
– З повагою, Роман Єпішев
Для того, щоб унеможливити зчитування картки, потрібно її екранувати. За
кордоном можна придбати “Credit Card Protector”, але якщо є бажання виготовити
екран самостійно, то достатньо створити “пакетик” з двох шарів паперу та
звичайної побутової фольги між ними: