
Encrypted Ubuntu One

Disclaimer

This is known to work in Oneiric (11.10), earlier versions don’t work due to inotify bug.

This document is provided AS IS. The author assumes no liability in case any sort of data loss occurs, but will be very interested in hearing about such case. As always, before panicking, check the Trash directory. Since Natty Ubuntu One deletes files to Trash instead of wiping them from the file system.

Update: The fix for this issue is in Ubuntu 12.04 so no PPA is needed now.

About encryption

A lot of Ubuntu One users were asking about the security of Ubuntu One. The official answer is available at the Ubuntu One FAQ but you need to know that although the data is sent over encrypted connections between the servers and clients, it is not encrypted when stored. This allows you to publish the files, share them with other users and access the data via the REST API.

This may not be obvious but when you ask the installer to encrypt your /home directory all applications that are running within the context of your user (such as the browser, e-mail client, or any syncing software) have the access to unencrypted versions of the files. This protection comes handy when you lose the access to the computer hard drive (e.g. when stolen or HDD is sent out to be replaced/repaired) but anything you run under your account will work with decrypted files.

It is possible to use some sort of encrypted containers, such as TrueCrypt. The drawback of this method is that you will need to upload the whole container even if you have changed just one byte. Even if Ubuntu One supported delta uploads, changing some subset of data in a really secure container would have affected quite a large area, in order to conceal the actual location of the changed bytes.

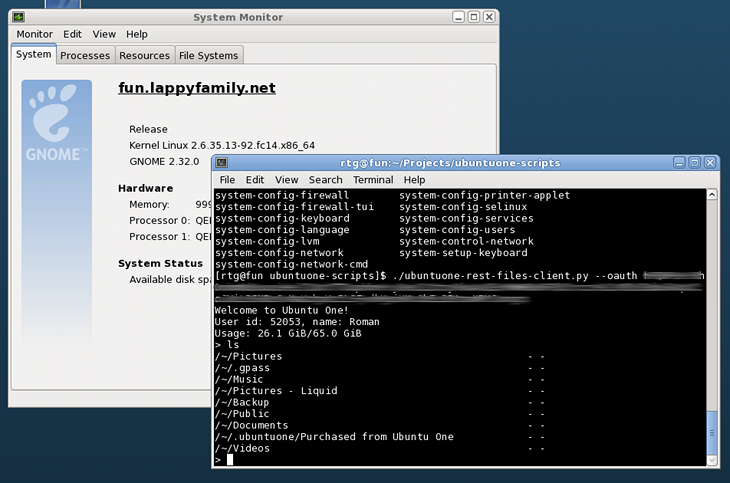
Another way is to encrypt each file separately and upload the changes as they are happening by monitoring the files. This creates two copies of the files, one is encrypted and another is not. See this example for such solution involving REST API.

But I wanted to use the tools already available in Ubuntu. The aforementioned technology of /home directory encryption is based on eCryptFS – a layered encrypted file system implemented in the kernel itself. I wanted to be able to share some subset of files as well as keeping some of them private to my machines (while synced to the cloud)

Unfortunately, my first attempt to use eCryptFS-driven ~/.Private UDF (User Designated Folder) was not successful – the kernel was not sending inotify events (LP:773260) to the subscribers which meant that I needed to ask the synchronization software to rescan the files every time I modified the files. The kernel issue has been fixed but now Ubuntu One gets notified about changes in encrypted directories and it does not expect this type of notification (LP:872894)

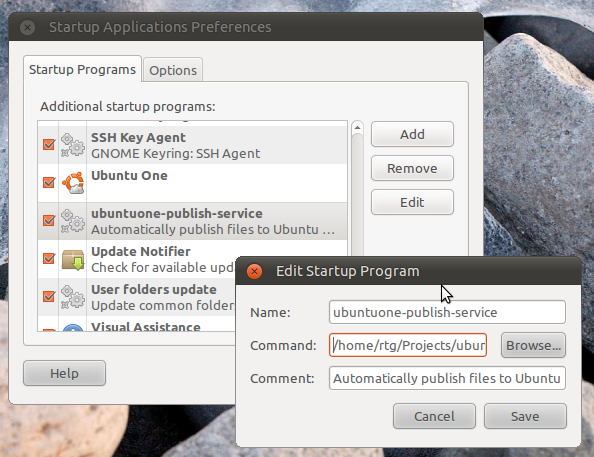
Fortunately, a simple patch for Ubuntu One is sufficient to enable correct interaction with encrypted directories and I have created a PPA (ppa:rye/u1lp872894) which contains the forks of currently released Ubuntu One client with this patch applied.

Contrary to how it looks, eCryptFS does not use your account password to decrypt your data. In this case, you would have needed to re-encrypt all the files every time you’d change your password. Instead, your account password is used to encrypt and decrypt the real mount pass phrase, stored in ~/.ecryptfs/wrapped-passphrase.

You want to be able to decrypt your data later on (possibly) another machine, so you will need to know the pass phrase. When you set up private ecryptfs directory, you will be prompted for it or you can set it manually. In any case you will be able to decrypt it using ecryptfs-unwrap-passphrase application. Write the key down somewhere in a secure place – we will need that.

Setting it up

In order to set up a private directory, you will just need to run the following:

$ ecryptfs-setup-private
Enter your login passphrase: <type your account password>
Enter your mount passphrase [leave blank to generate one]: <just Enter>

************************************************************************
YOU SHOULD RECORD YOUR MOUNT PASSPHRASE AND STORE IT IN A SAFE LOCATION.
ecryptfs-unwrap-passphrase ~/.ecryptfs/wrapped-passphrase
THIS WILL BE REQUIRED IF YOU NEED TO RECOVER YOUR DATA AT A LATER TIME.
************************************************************************

Done configuring.

Testing mount/write/umount/read...
Inserted auth tok with sig [de5cb8a79d96b6e4] into the user session keyring
Inserted auth tok with sig [87a5b4a8514fdcc9] into the user session keyring
Inserted auth tok with sig [de5cb8a79d96b6e4] into the user session keyring
Inserted auth tok with sig [87a5b4a8514fdcc9] into the user session keyring
Testing succeeded.

Logout, and log back in to begin using your encrypted directory.

So, now we have ~/.Private directory set up with a random pass phrase. Let’s find out what the pass phrase really is (as the ALL CAPS warning above tells us):

$ ecryptfs-unwrap-passphrase
Passphrase: <type your account password>
d5da6e5eaf98d8f2b0a481995710b57e

The d5da6e5eaf98d8f2b0a481995710b57e string is our real mount pass phrase in this case. Now you are ready to ask Ubuntu One to enable syncing of ~/.Private folder:

$ u1sdtool --create-folder ~/.Private

Now verify that the folder has been created, make sure that you have ubuntuone-client version 3.0 (or 2.0.0-0ubuntu2.2+lp872894 installed from the PPA) and restart the client

$ u1sdtool --quit
$ u1sdtool --start

Put some file to your ~/Private folder – by default ecryptfs encrypts file names too, so when the sync completes, you will find something like ECRYPTFS_FNEK_ENCRYPTED.FXYl0wXfbLRRD-S7MDeYn8SYOWt.3exR-KbLnhYMpLY8ZwrgYH6xb8MBtBSjZQS9Hfvjo5BYEvrowNc- in ~/.Private folder and on the web interface at https://one.ubuntu.com/files/.

Multiple machines

OK, now when files are syncing, you can set up Private directory on another Ubuntu machine and you will be able to access the encrypted files created on another machine.

I have to say that this does not work extremely well when you edit the same file on both machines. eCryptFS seems to have some caching in place that prevents the updated lower file from being immediately available on another machine. If you use the machines sequentially (e.g. home machine and laptop you are carrying around) then this should not be a problem.

So, make sure that another machine is also running the version that has the fix for eCryptFS and set up the private folder:

$ ecryptfs-setup-private
Enter your login passphrase: <account password>
Enter your mount passphrase [leave blank to generate one]: <passphrase from first computer>
Enter your mount passphrase (again): <passphrase from first computer again>

************************************************************************
YOU SHOULD RECORD YOUR MOUNT PASSPHRASE AND STORE IT IN A SAFE LOCATION.
ecryptfs-unwrap-passphrase ~/.ecryptfs/wrapped-passphrase
THIS WILL BE REQUIRED IF YOU NEED TO RECOVER YOUR DATA AT A LATER TIME.
************************************************************************

Done configuring.

Testing mount/write/umount/read...
Inserted auth tok with sig [2c007b978eb65d67] into the user session keyring
Inserted auth tok with sig [b899c2e5fcb355f2] into the user session keyring
Inserted auth tok with sig [2c007b978eb65d67] into the user session keyring
Inserted auth tok with sig [b899c2e5fcb355f2] into the user session keyring
Testing succeeded.

Logout, and log back in to begin using your encrypted directory.

Good, now subscribe to ~/.Private folder using ubuntuone-control-panel or u1sdtool (--list-folders to find out folder-id followed by --subscribe-folder=folder-id).

Restart Ubuntu One client and you should start getting the files you put to first ~/.Private folder and when you visit ~/Private folder and you will be able to work with unencrypted files. You might need to refresh the ~/Private folder for the changes to be visible, this is a limitation of eCryptFS.

Windows support

To put it simple, this will not work with Windows, Android or any other Ubuntu One client for any OS other than Linux with eCryptFS support. Windows does not support eCryptFS mounts and there appears to be no plans for this. There may be different solutions with similar approach on Windows. If you happen to know one, feel free to leave the comment.

The web interface and Android file sync client will show encrypted file names and will download encrypted content. I am not aware of any eCryptFS-decrypting solutions for Android.

Thanks

After all, this blog post does not reveal anything new. The idea to use eCryptFS with Ubuntu One is quite common. The only value this long post adds is that it gives the address of the PPA.

Using mod_auth_openid with Ubuntu SSO

I have some internal web sites running on my home server. Earlier I configured WebAuth with WebKDC to create SSO-like experience. This was working well, but I wanted to use some 3rd party solution to be able to use auth on remote services even if local WebAuth host is not accessible.

The requirements were:

  • Specify the list of users which are allowed to login.

  • Don’t require server-side scripting

Since Ubuntu SSO is already used for Launchpad, Ubuntu One and various other services I decided that it is good enough for my small network.

Ubuntu hosts are using python-apache-openid python module and it has a very nice feature of being able to restrict access to some launchpad teams. It is not yet critical for me so I decided to look around in the archive and found libapache2-mod-auth-openid.

This is a packaged version of mod_auth_openid from findingscience.com/mod_auth_openid – that web site contains the documentation for the module as well as examples.

The version in Oneiric is 0.5 which did not contain the feature I was after, the ability to restrict the access to some set of OpenID users without resorting to external script. So I went forward and updated the package to 0.6 and for the first time I was so pleased with the resulting package that I decided to send the updates to Debian maintainer. The updated package was successfully built in my ppa:rye/ppa and can be installed on Oneiric with

sudo apt-add-repository ppa:rye/ppa
sudo apt-get update
sudo apt-get install libapache2-mod-auth-openid

apt-add-repository is available from python-software-properties package.

Please verify that you have installed version 0.6:

$ apt-cache policy libapache2-mod-auth-openid
libapache2-mod-auth-openid:
Installed: 0.6-0ubuntu1
Candidate: 0.6-0ubuntu1

Configuration

I started with the following in my /etc/apache2/sites-available/default and added the items needed for OpenID support.

<VirtualHost *:80>
ServerAdmin webmaster@localhost

DocumentRoot /var/www
<Directory />
    Options FollowSymLinks
    AllowOverride None
</Directory>
<Directory /var/www/>
    Options Indexes FollowSymLinks MultiViews
    AllowOverride None
    Order allow,deny
    allow from all
</Directory>

# OpenID support:
<Location />
    AuthType OpenID
    Require valid-user
    AuthOpenIDTrusted ^https://login.ubuntu.com/\+openid
    AuthOpenIDLoginPage /openid/
    AuthOpenIDCookiePath /
</Location>

<Location /openid>
    Order allow,deny
    Allow from all
    Satisfy any
</Location>
# /OpenID support

ScriptAlias /cgi-bin/ /usr/lib/cgi-bin/
<Directory "/usr/lib/cgi-bin">
    AllowOverride None
    Options +ExecCGI -MultiViews +SymLinksIfOwnerMatch
    Order allow,deny
    Allow from all
</Directory>

ErrorLog ${APACHE_LOG_DIR}/error.log

# Possible values include: debug, info, notice, warn, error, crit,
# alert, emerg.
LogLevel warn

CustomLog ${APACHE_LOG_DIR}/access.log combined

Alias /doc/ "/usr/share/doc/"
<Directory "/usr/share/doc/">
    Options Indexes MultiViews FollowSymLinks
    AllowOverride None
    Order deny,allow
    Deny from all
    Allow from 127.0.0.0/255.0.0.0 ::1/128
</Directory>

</VirtualHost>

I am using a custom login page since I don’t need to enter my identifier every time. I am using a single provider so I am submitting an OpenID request automatically to Ubuntu SSO.

The /var/www/openid/index.html page is simple:

The query string parsing is actually needed to display the error that has been passed to the page in case the request is canceled on the provider or something else has happened.

By default the module creates the database in /tmp/mod_auth_openid.db, you can change it with AuthOpenIDDBLocation directive. If you migrate to some other host and forget to create the necessary paths for the database, you will get no_idp_found errors as if fetching the OpenID page failed.

Now the module needs to be enabled (this was not working in 0.5 out of the box) and apache needs to be restarted:

sudo a2enmod authopenid
sudo service apache2 restart

Now you have OpenID enabled for your virtual host root directory. The thing is it is enabled for everybody with Ubuntu SSO account so we need to restrict the access.

To find your OpenID identifier, log into your system using OpenID and browse the logs:

192.168.1.114 - https://login.ubuntu.com/+id/hPQWPsH ↩
[12/Nov/2011:12:24:54 +0200] ↩
"GET / HTTP/1.1" 304 210 "-" "Mozilla/5.0 ↩
(Ubuntu; X11; Linux x86_64; rv:8.0)

Accounts that exist in launchpad can find out their +id/... value from the https://launchpad.net/~yournick, the openid.delegate will have this info. Launchpad login service and Ubuntu SSO service are currently using the same database, but we are targeting SSO.

<link rel="openid.delegate"
    href="https://login.launchpad.net/+id/hPQWPsHxx" />

The OpenID value needs to go to the apache config as regular “Require user” directive:

<Location />
  AuthType OpenID
  Require user https://login.ubuntu.com/+id/hPQWPsH
  AuthOpenIDTrusted ^https://login.ubuntu.com/\+openid
  AuthOpenIDLoginPage /openid/
  AuthOpenIDCookiePath /
</Location>

Restart apache, and only the user specified in the Require user directive will be able to access the resource.

Limitations

This module can be used only for ID authentication. While it is technically possible to request the OpenID provider to reply with user email or any other attributes, the module does not provide any protection from changing the values as they are traveling as a GET request back to the original form target page.

Warning: Samsung ChatON

Update (2012-12-04): I have installed the client again and tried to intercept messages. It looks like the server-side was fixed and now every server uses encryption (likely AES) to encrypt the protobuf payload. The key for the payload is negotiated over HTTPS connection. So it is moderately safe to use ChatON on the public networks. However, file uploads and downloads are still using plain HTTP connection and that means they can be easily intercepted.

There is also an online version of ChatON which uses HTTPS only and a different set of servers.

This is a final update. I will most likely not use ChatON in the future unless I replace my phone as the recommended Android version is 2.3 (I have 2.2). Samsung does provide access to the Server API http://developer.samsung.com/chaton-api, but it is currently in closed beta, so no protocol details are shared.

Old content goes below:


/galleries/dropbox/chaton.png

tl;dr version: Do not use ChatON on the public WiFi networks. The communication between client and server is not encrypted.

Two days ago Samsung launched their new IM service ChatON. ChatON Android application was released and its UI is definitely awesome. Having obtained my copy from Android Market I decided to check what protocol it is using for communication.

I launched tcpdump on my (rooted) Acer Liquid and started listening for the messages.

Among the lines of https (encrypted) messages flowing back and forth I found the following:

21:05:01.146225 IP 46.203.98.114.42914 > 46.137.191.242.5223: P 118:345(227) ack 1 win 5600
0x0000:  4500 0117 30e8 4000 4006 8940 2ecb 6272  E...0�@.@..@.�br
0x0010:  2e89 bff2 a7a2 1467 ab45 ae43 4473 fdf8  ..����.g�E�CDs�
0x0020:  8018 15e0 fab9 0000 0101 080a 00db c787  ...���.......��.
0x0030:  0ba8 7d12 6264 3530 6263 3337 2d65 6532  .�}.ba50bc37-ee2
0x0040:  382d 3432 6366 2d61 6531 352d 3133 3731  8-42cf-ae15-1371
0x0050:  3334 3466 3363 3464 0104 00bb 08cd f7ef  344f3c4d...�.��
0x0060:  87d8 e820 1000 1800 2248 3462 3064 6365  .��....."H4b0dce
0x0070:  6638 2d64 3733 322d 3464 3038 2d62 3062  f8-d732-4d08-b0b
0x0080:  612d 6536 3862 3263 3931 3066 6662 6264  a-e68b2c910ffbbd
0x0090:  3530 6263 3337 2d65 6532 382d 3432 6366  50bc37-ee28-42cf
0x00a0:  2d61 6531 352d 3133 3731 3334 3466 3363  -ae15-1371344f3c
0x00b0:  3464 2a0c 3338 3039 3133 3532 3930 3539  4d*.380913529059
0x00c0:  320c 3338 3039 3337 3532 3539 3836 3a24  2.380937525986:$
0x00d0:  6264 3530 6263 3337 2d65 6532 382d 3432  bd50bc37-ee28-42
0x00e0:  6366 2d61 6531 352d 3133 3731 3334 3466  cf-ae15-1371344f
0x00f0:  3363 3464 420f 3335 3335 3039 3033 3132  3c4dB.3535090312
0x0100:  3536 3238 354a 1068 692c 2068 6f77 2061  56285J.hi,.how.a
0x0110:  7265 2079 6f75 3f                        re.you?

21:05:07.236157 IP 46.137.191.242.5223 > 46.203.98.114.42914: P 228:422(194) ack 345 win 62
0x0000:  4500 00f6 af74 4000 3206 18d5 2e89 bff2  E..��t@.2..�..�
0x0010:  2ecb 6272 1467 a7a2 4473 fedb ab45 af26  .�br.g��Ds�۫E�&
0x0020:  8018 003e b6d2 0000 0101 080a 0ba8 8550  ...>��.......�.P
0x0030:  00db c787 6264 3530 6263 3337 2d65 6532  .��.ba50bc37-ee2
0x0040:  382d 3432 6366 2d61 6531 352d 3133 3731  8-42cf-ae15-1371
0x0050:  3334 3466 3363 3464 0106 009a 0a48 3462  344f3c4d.....H4b
0x0060:  3064 6365 6638 2d64 3733 322d 3464 3038  0dcef8-d732-4d08
0x0070:  2d62 3062 612d 6536 3862 3263 3931 3066  -b0ba-e68b2c910f
0x0080:  6662 6264 3530 6263 3337 2d65 6532 382d  fbbd50bc37-ee28-
0x0090:  3432 6366 2d61 6531 352d 3133 3731 3334  42cf-ae15-137134
0x00a0:  3466 3363 3464 1000 1a4a 0a0c 3338 3039  4f3c4d...J..3809
0x00b0:  3337 3532 3539 3836 120c 3338 3039 3133  37525986..380913
0x00c0:  3532 3930 3539 1884 d185 fb9e c816 221b  529059..�.�.�.".
0x00d0:  6920 7761 6e74 2061 205b 686d 5d20 616e  i.want.a.[hm].an
0x00e0:  6420 6120 5b35 286c 6c29 5d28 c3e5 bb98  d.a.[5(ll)](���.
0x00f0:  b126 3000 2800                           �&0.(.

Do you see something?

Here’s what you saw:

/galleries/dropbox/ChatON-conversation.png

Basically, connection to the server is not (always) encrypted.

The client is using Google Protobuf protocol to send messages back and forth between client and server and the communication is not encrypted in any way. After more careful examination I found that the session initiation IS encrypted, so that it may not be possible to find whom exactly with you are talking to but all the messages will be visible to everybody around you if you are using an unencrypted open network such as you can find at the local cafe shops, restaurants, shopping centres etc.

You may not be in that amount of danger if you are using your cell phone carrier for the internet connection, that communication is encrypted between your phone and the cell towers, however you might not always realize that you have switched to open WiFi network and keep using ChatON.

I don’t have a Bada-powered device nearby to verify whether that uses the same servers so I will assume that the same unencrypted protocol is used on all Bada devices and Samsung featurephones that have ChatON installed unless I have the proof that it is doing otherwise.

Interesting geeky detail – the servers are running on port 5223 which is usually associated with XMPP over SSL but it is actually a proprietary protocol (well, based on Google’s protobuf). The chat servers are running on Amazon AWS hosts.

File uploads are also running over plain HTTP/1.1 without encryption:

POST /file?uid=bd50bc37-...-1371344f3c4d¶m=7daffaa462b802b...92e37870 HTTP/1.1
content-type: image/jpeg
content-length: 48401
User-Agent: Dalvik/1.2.0 (Linux; U; Android 2.2.2; Liquid Build/FRG83G)
Host: eu.file.samsungchaton.com
Connection: Keep-Alive

...

GET /4b/0d/ce/f8/d7/32/4d/08/b0/ba/e6/8b/2c/91/0f/fb/4b0dcef8-d732-4d08-b0ba-e68b2c910ffb/
    1318879486269_239.jpg?AWSAccessKeyId=AKIAIXENATYOW4T2DJSQ&
    Expires=1319052296&Signature=6UFD%2FYS9Vlls9X7WJov8GcH7EGs%3D HTTP/1.1
User-Agent: Dalvik/1.2.0 (Linux; U; Android 2.2.2; Liquid Build/FRG83G)
Host: eu.chaton-file.s3.amazonaws.com
Connection: Keep-Alive

HTTP/1.1 200 OK
x-amz-id-2: PNglgPsPAkR7SvhFPHk2bkl901Q6MGedePoaCRf/RGArSM36lZgtkMWLN10nmzZK
x-amz-request-id: E25D27220B372F64
Date: Mon, 17 Oct 2011 19:24:58 GMT
Last-Modified: Mon, 17 Oct 2011 19:24:51 GMT
ETag: "3ec7437168455698b4367ed303bfcfad"
Accept-Ranges: bytes
Content-Type: image/jpeg
Content-Length: 738
Server: AmazonS3

...

Ah, when user is not properly registered (ChatON on Android Emulator) the message returned is…

13:56:58.562553 IP 46.203.53.202.59299 > 46.137.191.242.5223: P 216:450(234) ack 185 win 3456
0x0000:  4500 011e df2c 4000 4006 079d 2ecb 35ca  E...�,@.@....�5
0x0010:  2e89 bff2 e7a3 1467 38a3 84e8 4513 9da9  ..����.g8�.�E..�
0x0020:  8018 0d80 2c9f 0000 0101 080a 001a 66c4  ....,.........f
0x0030:  0c05 21a6 6264 3530 6263 3337 2d65 6532  ..!�bd50bc37-ee2
0x0040:  382d 3432 6366 2d61 6531 352d 3133 3731  8-42cf-ae15-1371
0x0050:  3334 3466 3363 3464 0104 00c2 088a e2a2  344f3c4d...�..
0x0060:  fea5 8004 1000 1800 2248 6264 3530 6263  ��......"Hbd50bc
0x0070:  3337 2d65 6532 382d 3432 6366 2d61 6531  37-ee28-42cf-ae1
0x0080:  352d 3133 3731 3334 3466 3363 3464 6366  5-1371344f3c4dcf
0x0090:  6662 3933 3939 2d63 3935 332d 3462 6465  fb9399-c953-4bde
0x00a0:  2d39 3266 352d 6639 6435 3136 3862 3562  -92f5-f9d5168b5b
0x00b0:  3764 2a0c 3338 3039 3133 3532 3930 3539  7d*.380913529059
0x00c0:  320c 3338 3036 3336 3137 3038 3335 3a24  2.380636170835:$
0x00d0:  6264 3530 6263 3337 2d65 6532 382d 3432  bd50bc37-ee28-42
0x00e0:  6366 2d61 6531 352d 3133 3731 3334 3466  cf-ae15-1371344f
0x00f0:  3363 3464 420f 3335 3335 3039 3033 3132  3c4dB.3535090312
0x0100:  3536 3238 354a 174e 6f77 2069 7420 6973  56285J.Now.it.is
0x0110:  2077 6f72 6b69 6e67 2061 6761 696e       .working.again
13:56:59.643944 IP 46.137.191.242.5223 > 46.203.53.202.59299: P 185:369(184) ack 450 win 62
0x0000:  4500 00ec 8237 4000 3206 72c4 2e89 bff2  E..�.7@.2.r�..�
0x0010:  2ecb 35ca 1467 e7a3 4513 9da9 38a3 85d2  .�5�.g��E..�8�.
0x0020:  8018 003e a34b 0000 0101 080a 0c05 2a79  ...>�K........*y
0x0030:  001a 66c4 6264 3530 6263 3337 2d65 6532  ..f�bd50bc37-ee2
0x0040:  382d 3432 6366 2d61 6531 352d 3133 3731  8-42cf-ae15-1371
0x0050:  3334 3466 3363 3464 0105 0090 088a e2a2  344f3c4d......
0x0060:  fea5 8004 1248 6264 3530 6263 3337 2d65  ��...Hbd50bc37-e
0x0070:  6532 382d 3432 6366 2d61 6531 352d 3133  e28-42cf-ae15-13
0x0080:  3731 3334 3466 3363 3464 6366 6662 3933  71344f3c4dcffb93
0x0090:  3939 2d63 3935 332d 3462 6465 2d39 3266  99-c953-4bde-92f
0x00a0:  352d 6639 6435 3136 3862 3562 3764 1a13  5-f9d5168b5b7d..
0x00b0:  0a0e 3436 2e31 3337 2e31 3137 2e32 3334  ..46.137.117.234
0x00c0:  10e7 2820 96cc b5b5 b126 2a20 08f2 2e12  .�(..̵��&*..�..
0x00d0:  1b4d 6573 7361 6765 2052 6563 6569 7665  .Message.Receive
0x00e0:  7220 6973 2049 6e76 616c 6964            r.is.Invalid

Ubuntu One, Headless

Update: James Henstridge wrote u1ftp FTP Server/REST API client. This way you can use any FTP client to access Ubuntu One files.

Update: Another way is simply to use curl – Upload to Ubuntu One using curl.

Notice: To run real Ubuntu One syncdaemon in headless mode, see Ubuntu One Headless wiki page.

Another idea I have been thinking about for quite a long time but it became extremely simple after Ubuntu One introduced REST API for file access. This API is used by a really wonderful Ubuntu One Files application for Android by Michał Karnicki and Web&Mobile team and John’s u1rest library.

I decided to see how hard would it be to create a command line application similar to ftp to upload and download files and navigate my cloud storage using the API directly. The application needed to be usable in the server environment too.

This is the initial version:

rtg@lucidity:~$ ./ubuntuone-rest-files-client.py --oauth a:b:c:d
Welcome to Ubuntu One!
User id: 52053, name: Roman
Usage: 26.1 GiB/65.0 GiB
> ls
/~/Pictures                                        - -
/~/.gpass                                          - -
/~/Music                                           - -
/~/Pictures - Liquid                               - -
/~/Backup                                          - -
/~/Public                                          - -
/~/Documents                                       - -
/~/.ubuntuone/Purchased from Ubuntu One            - -
/~/Videos                                          - -
> cd ~/Documents
/~/Documents&amp;gt; ls
Articles/                                             2011-04-05T20:07:40Z
Certificates/                                         2011-04-18T07:32:28Z
CV/                                                   2010-12-01T11:14:08Z
DVD Labels.odg                                  13332 2011-03-06T20:38:50Z
eBooks/                                               2011-08-05T15:08:03Z
_image_vab-document.png                        145336 2011-04-30T10:15:33Z
...
/~/Documents> get _image_vab-document.png
Downloading 145336 bytes to _image_vab-document.png...  Done
/~/Documents> cd ../Ubuntu\ One
/~/Ubuntu One> put desktopcouch_0.6.4.orig.tar.gz
Uploading desktopcouch_0.6.4.orig.tar.gz to https://files.one.ubuntu.com/content/~/Ubuntu%20One/desktopcouch_0.6.4.orig.tar.gz
Content size: 105609
/~/Ubuntu One>

Well, you understand the idea. Please note that at the moment this is a very rough version, so download and use it if you really like to play with something that may suddenly break.

Where to get and how to use

You will need 2 files from ubuntuone-scripts repository – bzr branch lp:~rye/+junk/ubuntuone-scripts, you can download the latest versions directly from ubuntuone-sso-login.py and ubuntuone-rest-files-client.py. In order to get the a:b:c:d values that are the value for --oauth option run the first script as follows:

$ ./ubuntuone-sso-login.py
Creating new entry for buzz
SSO login: Your Ubuntu One SSO e-mail
password: Your password
Using SSO URL: https://login.ubuntu.com/api/1.0/authentications?ws.op=authenticate&token_name=%22Ubuntu+One+%40+buzz%22
OAuth info:
a:b:c:d
Ping result: ok 1/7

We are interested in the line after OAuth info. It will be a long string.

Warning! This OAuth string should be treated as secret, since it is composed of your OAuth consumer key:consumer secret:token:token secret. This string enables anybody who knows it to access your files, and CouchDB databases, think of it as a login/password pair that you can remove when needed. If you suspect that somebody else has that string, go to Ubuntu One web site and remove the corresponding entry. Then you can run ubuntuone-sso-login.py again and get a new set of credentials for the script.

Then run ubuntuone-rest-files-client.py:

./ubuntuone-rest-files-client.py --oauth a:b:c:d
Welcome to Ubuntu One!
User id: 52053, name: Roman
Usage: 26.1 GiB/65.0 GiB
>

That’s pretty much it. The following commands are supported:

  • get remote [local] – download the remote file as local, in case local name is omitted it will use the original name

  • put local [remote] – upload the local file, same rules for omitting the remote name

  • mget remote1 [remote2 remote3 ... remoteN] – download the files to the current working directory

  • cd folder – change remote directory. Please remember to quote the path if it contains spaces or escape them – "/~/Ubuntu One" or /~/Ubuntu One

  • quit or Ctrl+D – terminate the script

  • ls – list folder contents, in case some file is published the URL will be printed

  • publish remote – publish an already uploaded file. Will print public URL

  • unpublish remote – take down the published file

More commands will be added later, at the moment this is a working proof of concept but I am very happy with the API so far. I will make the script much more stable and use less resources in the future (at the moment the whole file is read into memory during upload/download – thank you httplib2). Ah, by the way, it works on Fedora too:

/galleries/dropbox/headless-ubuntuone-fedora.png

Проблемы Acer Liquid E

Так как этот телефон все еще продается в магазинах, то хотел бы описать его недостатки, которые становятся заметными через некоторое время. Возможно, это кому-нибудь поможет в выборе.

Read more…

Проблема с HUAWEI E1550 после активации голоса через MTS PatchDataCard

Update: Еще раз перешил модем, уже поправив дату для программы и убрав невозможность разблокирования. В принципе, это активатор голоса для life:) украина, 255-06, требуется только добавить свой IMEI. Скачать можно с Ubuntu One или Яндекс.Диска.

Загорелся я идеей подключить свой life:) модем еще и для голоса. Первый вариант, dc-unlocker пока был отложен в сторонку т.к. я еще не готов был платить за вещь, которая, возможно, мне не будет нужна.

После того, как я произвел процедуры, описанные в активации голоса на модемах HUAWEI E1550, E1750, Е156, E160 и подобных, мой модем больше не захотел подключаться к сети life:) и настаивал на переезде в Россию к МТС. AT^CARDLOCK возвращали “+CME ERROR: 16”. Похоже, что в патче к nvram SIM LOCK сделался неснимаемым для моего модема.

В Resource Hacker, который будет в том-же архиве по инструкции нужно сменить IMEI. Но для того, чтобы все заработало мне пришлось менять и SIMLOCK_RANGE_0 на значения life – 25506. На всякий случай оставил 25506|25506|2 – для чего еще раз идентификатор и что значит “2” – я не знаю. Возможно это и есть флаг, который указывает на то, можно ли снимать привязку. После изменения любого значения в ресурсе, программа будет ругаться на несоответствие CRC. Над чем именно вычисляется CRC я не докопался, поэтому пошел в лоб – отлавливать значение CRC, которое программа хочет увидеть.

После скачивания в IDA ставим breakpoint на text.00403853 (в районе CRCSlow), запускаем программу через отладчик, когда сработает breakpoint в регистре ESI будет значение контрольной суммы, которое нужно прописать в [CRC] VALUE. Переводим значение из шестнадцатеричного в десятичный, еще раз идем в Resource Hacker, меняем значение суммы, Compile Script, Save и запускаем PatchDataCard снова.

Фух. Я думал, что придется возиться долго.

Кстати, там еще есть и ресурс с датой, до которой программа может работать, думаю, можно тоже подправить. И, возможно, полностью снести SIM LOCK. Не знаю, результатом доволен. Модем снова зарегистрировался в сети life:)

AT+CREG?
+CREG: 0,1

OK
AT^CVOICE?
^CVOICE:0,8000,16,20

OK

Версия прошивки – 11.030.01.07.388

Отчеты в налоговую по E-Mail

Что огорчает предпринимателя на едином налоге в Украине? То, что каждый квартал нужно сдавать отчет в Налоговую, а сейчас потребовалось ежемесячно сдавать пустую декларацию.

Раньше это означало, что несколько дней в году нужно провести в налоговой инспекции, стоя в очередях. По какой-то причине в один прекрасный момент это перестало быть интересным нашей налоговой администрации, и было решено разрешить предпринимателям сдавать отчеты в электронной форме.

Для этого требуется получить ключ и сертификат в одном из авторизованных центров сертификации, принести этот сертификат в налоговую, заключить с инспекцией договор о том, что отныне документы, подписанные Вашим ключом, будут приравниваться к оригиналам, скачать ПО для создания (возможны различные варианты) и шифрования (зависит от центра сертификации) отчетов и начать им пользоваться.

Единственным неудобством для меня является необходимость использования Windows, т.к. HTML Application "ОПЗ" отказывается запускаться под Wine. Однако приложение для шифрования отчетов спокойно запускается в Wine и все красиво показывает, если ему передать LC_ALL=uk_UA.UTF-8.

Как все происходит

Сдача отчетов проходит следующим образом:

  1. Создаю документ в OPZ в виртуальной Windows.

  2. Копирую результат на основную машину в папку, которая синхронизируется с Ubuntu One.

  3. Программа для шифрования подписывает мой отчет и шифрует его публичным ключом налоговой администрации.

  4. Результирующий файл я отправляю по E-Mail на шлюз электронной отчетности.

  5. В течении нескольких минут мне приходят несколько зашифрованных сообщений, в которых говорится о статусе обработки отчета.

Почему-то первой реакцией моих коллег на то, что я сдаю отчетность в электронном виде, было непонимание, зачем мне для четырех раз в год этим было заниматься, да еще и платить 48₴ в год. В качестве примера удобства данного механизма я начал приводить свой отчет, отправленный 2010-01-04 в 00:18. Через несколько минут отчет был принят, и у меня был регистрационный номер. В час ночи.

Об ошибках

Пока единственной проблемой, с которой я столкнулся,​ было следующее сообщение от шлюза отчетности:

Блок даних. Невірний підпис - сертифікат відсутній в базі сертифікатів

Как оказалось, сертификаты ИВК имеют свойство менять свой тип на "печатка" вместо "підпис". После звонка в налоговую и (как ни странно) приятного и результативного общения с сотрудницей отдела, занимающегося электронной отчетностью, я смог отправить декларацию без каких-либо проблем, попивая чай у себя дома.

Screen Flashlight: Building the first app

/galleries/dropbox/android-app.png

So, I finally got an Android-based Acer Liquid S100 (Liquid E, with 512Mb RAM). I've spent some time to get accustomed to the Acer changes to the UI and apps and finally found that I can not use Funambol Sync properly on that device. Acer simply replaced the Contacts application with their own version which does not ask for the application to edit the contact. Basically Funambol Contacts are read-only on that device. So I started looking around to find how android is being built.

Liquid E does not have any flash LED (the only thing I am missing that was in my Nokia 5530). The flashlight is rather important to have so every time I reflashed the device to stock state I had to go to Android Market and pick the simplest app possible. At some moment I realized that I cannot find that application anymore.

How hard is it to build a blank screen/full brightness app?

Manifest:

screenlight/AndroidManifest.xml (Source)

<?xml version="1.0" encoding="utf-8"?>
<manifest xmlns:android="http://schemas.android.com/apk/res/android"
      package="com.errormessaging.screenlight"
      android:versionCode="1"
      android:versionName="1.0">
    <application android:icon="@drawable/icon"
                 android:label="@string/app_name"
                 android:theme="@android:style/Theme.NoTitleBar.Fullscreen">
        <activity android:name=".ScreenLight"
                  android:label="@string/app_name">
            <intent-filter>
                <action android:name="android.intent.action.MAIN" />
                <category android:name="android.intent.category.LAUNCHER" />
            </intent-filter>
        </activity>
    </application>
</manifest>

The source code goes to src/com/errormessaging/screenlight/ScreenLight.java:

screenlight/ScreenLight.java (Source)

package com.errormessaging.screenlight;

import android.app.Activity;
import android.os.Bundle;
import android.view.WindowManager;

public class ScreenLight extends Activity {
    /** Called when the activity is first created. */
    @Override
    public void onCreate(Bundle savedInstanceState) {
        WindowManager.LayoutParams lp = getWindow().getAttributes();
        lp.screenBrightness = 1f;
        lp.flags |= WindowManager.LayoutParams.FLAG_KEEP_SCREEN_ON;
        getWindow().setAttributes(lp);

        super.onCreate(savedInstanceState);
        setContentView(R.layout.main);
    }
}

That's it.

Source

Full source code for this awesome application is available in Launchpad Bazaar:

bzr branch lp:~rye/+junk/screenlight-android

You can download the compiled Screen Light.apk (signed with debug key) from Ubuntu One.

Have you seen my weather applet?

Do you remember seeing this?

/galleries/dropbox/karmic-screen-up-to-date.png

When Ubuntu One was initially released, it contained a handy applet called, well, ubuntuone-client-applet. Here’s the picture of the latest karmic applet right click menu:

/galleries/dropbox/karmic-menu.png

This applet became a victim of a complex state machine that was switching back

/galleries/dropbox/karmic-updating-notifications.png

and forth

/galleries/dropbox/karmic-finished-updating.png

between idle and working states causing a ton of Your files are up to date notifications. It also had a very handy menu entry called “Report a problem” due to which Ubuntu One team started receiving bug reports about various Ubuntu components. It was very sensitive to DBus timeouts caused by slow syncdaemon startup (actually the root cause is bug 436612) as well.

It was decided that the applet has to go away and Ubuntu One should become as unobtrusive as possible.

Unfortunately, this brought a different problem. Luсid version did not contain any quick way to find the status of synchronization. Yes, ubuntuone-preferences could show current quota usage and the status, but there was no info about the number of files left to synchronize. So again, u1sdtool --waiting-meta and --waiting-content became our best friends. As a result, it is not possible to quickly find out whether all files are synchronized before shutting down your computer or disconnecting from the network.

So I thought that it may be a good idea to provide an independent implementation of the applet with all necessary features based on dbus interaction with syncdaemon and REST api and Application Indicators.

Please note that ubuntuone-indicator is not an official part of Ubuntu One project. This is not a full-fledged launchpad project yet but I plan to get to that pretty soon.

Here’s how it looks now for me:

/galleries/dropbox/ubuntuone-indicator-synchronizing.png

It turned out that the designers continued creating ubuntuone-client icons even though the applet was no longer there. So the first iterations of the indicator will use them. Later on I plan to add more icons to properly reflect disconnected state (no exclamation mark!) and an error condition (red cloud? )

Here’s the video that shows how that indicator works in real life together with automatic publishing feature described in my previous post:

And now the final question: where can you get it? Well, the early deb package is here – ubuntuone-indicator_0.0.1-0ubuntu1_all.deb on Ubuntu One. I should say that it is unstable receiving X BadMatch errors occasionally and my packaging skills are not yet as good as I want them to be. The source is available from launchpad bazaar branch: lp:~rye/ubuntuone-client/ubuntuone-indicator

If you are wondering about the title of the post… The cloud icon can be easily mistaken for a weather applet and we have at least one bug report that references our ubuntuone-client applet as ‘weather applet’. OTOH the launchpad example bug description ‘Weather applet crashed on logout’ might have contributed to this as well.

Huge update

I was not really expecting this amount of interest for this project and I thank everyone who said they like this tiny indicator. Let’s make it awesome together!

Project is now published as one-indicator on Launchpad and ppa:rye/ubuntuone-extras now contains ubuntuone-indicator for Maverick Meerkat as well as Lucid Lynx. Please note that Lucid Lynx client does not show Metadata Queue size/estimate currently due to the fact that SyncDaemon does not provide that info but I have some thoughts about how that can be simulated.

Ubuntu Precise (12.04) update: The package has been rewritten and renamed, see this newer post on the brand new indicator.

Ubuntu One automatic publishing

/galleries/dropbox/u1-64x64.png

I find myself publishing files pretty often using Ubuntu One. In fact my ~/Public folder is now filled with published files so I usually put the file to ~/Public folder, wait for it to upload, request publishing and then get the URL.

The better approach would have been to publish the files automatically but this functionality is not present in the client. Fortunately, Ubuntu One syncdaemon provides a nice DBus interface, so this is extremely easy to program so I decided to go ahead and implement such a service.

Setting up automatic publishing

Download the script from Ubuntu One or branch the bzr tree using bzr branch lp:~rye/+junk/ubuntuone-scripts.

Put the script to some well-known directory and add it to Startup Applications:

Startup Applications window screenshot

Set the command to the path of the script and add the directory which will be used for public files. In my case that is:

/home/rtg/Projects/ubuntuone-scripts/ubuntuone-publish-service.py /home/rtg/Public

Testing

After the file is put to this directory, it is uploaded to Ubuntu One online storage and marked as published you will receive a notification:

/galleries/dropbox/publish-service-notification.png

If you decide that you no longer need the file to be published but you might need it in the future you can stop publishing it using nautilus plugin and you will receive a notification as well:

/galleries/dropbox/publish-service-notification-removed.png

Getting URL

You will still need to use nautilus plugin to get URL for that file.